This tool allows facility owners, operators, and veterinarians the opportunity to visualize their biosecurity plans; providing the valuable opportunity to “walk-through” their facility for more comprehensive and detailed planning.
What You Get
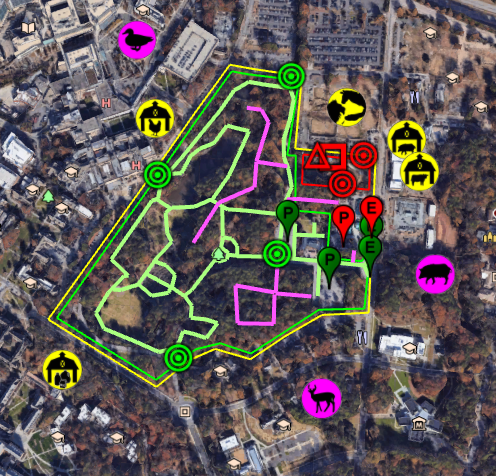
Upon completion, users will have a detailed map that can be used at the facility level and demonstrate biosecurity for SAHOs. Your finished product could show:
- Staff and visitor pathways
- Entrances
- Controlled access points
- Isolation areas
- Food prep areas
- Facility boundaries
- Surrounding wildlife
- Surrounding agricultural industries
- and more!
Getting Started
Everything you need to get started in developing your own biosecurity map can be found in the materials folder linked below.
This tool is demonstrated using Google Earth Pro, but can be adapted for use with other GIS software including ArcGIS, Qgis, or other mapping tools. Google Earth Pro can be downloaded for free at https://www.google.com/earth/versions/#download-pro.
An illustration has been included below to show where to begin after downloading materials; please see the Biosecurity Mapping Tool – Instructional Guide for detailed instructions.
All materials including instructional guides, templates, icons and examples can be found in the folder linked below.
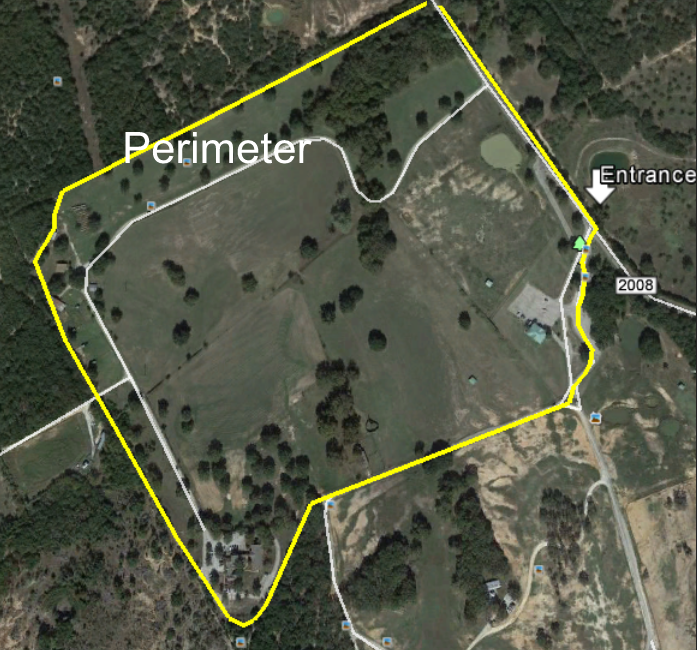
Step One: Create a Perimeter Line
First, identify and draw the boundary of the property used to contain manage the animals in the facility. This line designates the Perimeter and the resulting Perimeter Buffer Area within the Perimeter. This will help the Facility Manager and SAHO understand the relationship to neighbors, wildlife, and the area they can effectively manage.
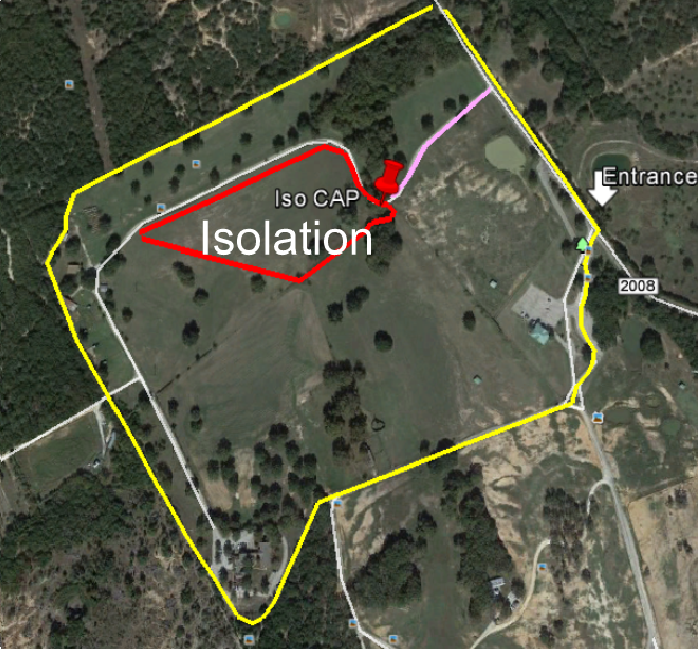
Step Two: Create an Isolation Area
Next, designate the Isolation Area; the most long-term biosecure animal confinement area in the facility.
You will also need to designate the Controlled Access Point (CAP), where PPE biosecurity protocols are implemented, for the Isolation Area and a designated Staff access path.
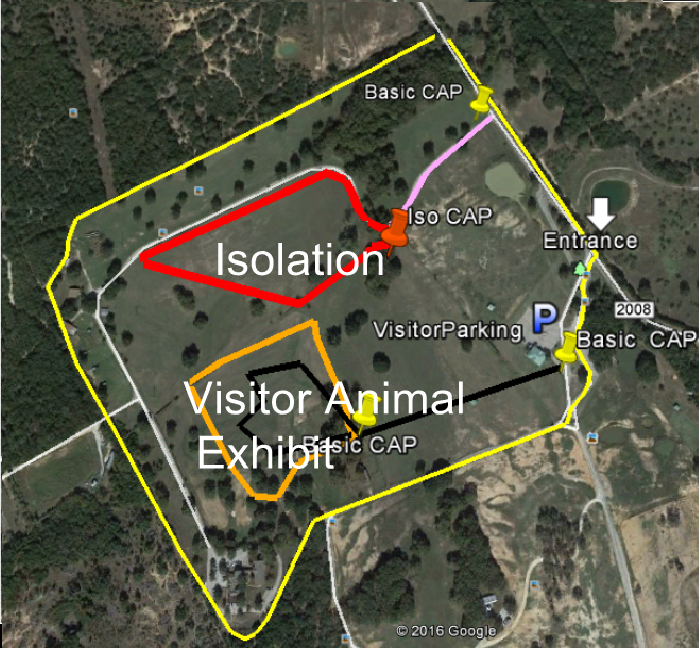
Step Three: Designate Other Areas
Last, designate other areas within the facility. This may include visitor areas, parking, visitor paths, visitor animal exhibits, controlled access points, food prep areas, and more.
Note: Visitor and staff pathways never cross and susceptible animals are never exposed to visitors.